
Pipo Analog Input Explained
Analog voltage inputs
Pipo uses "Grove" connectors standard as a mean to connect analog voltage inputs. Grove connectors are much more reliable than classic headers, compact, they cary power, and are now wide spread among electronics prototyping standards, which make them a very good choice to balance ease of use and robustness. They also allow you to connect various types of sensor modules instantly !
Tips
You can source all kinds of adaptors, modules, or grove cables in any electronics/iot shops (see PAGE)
Pin map
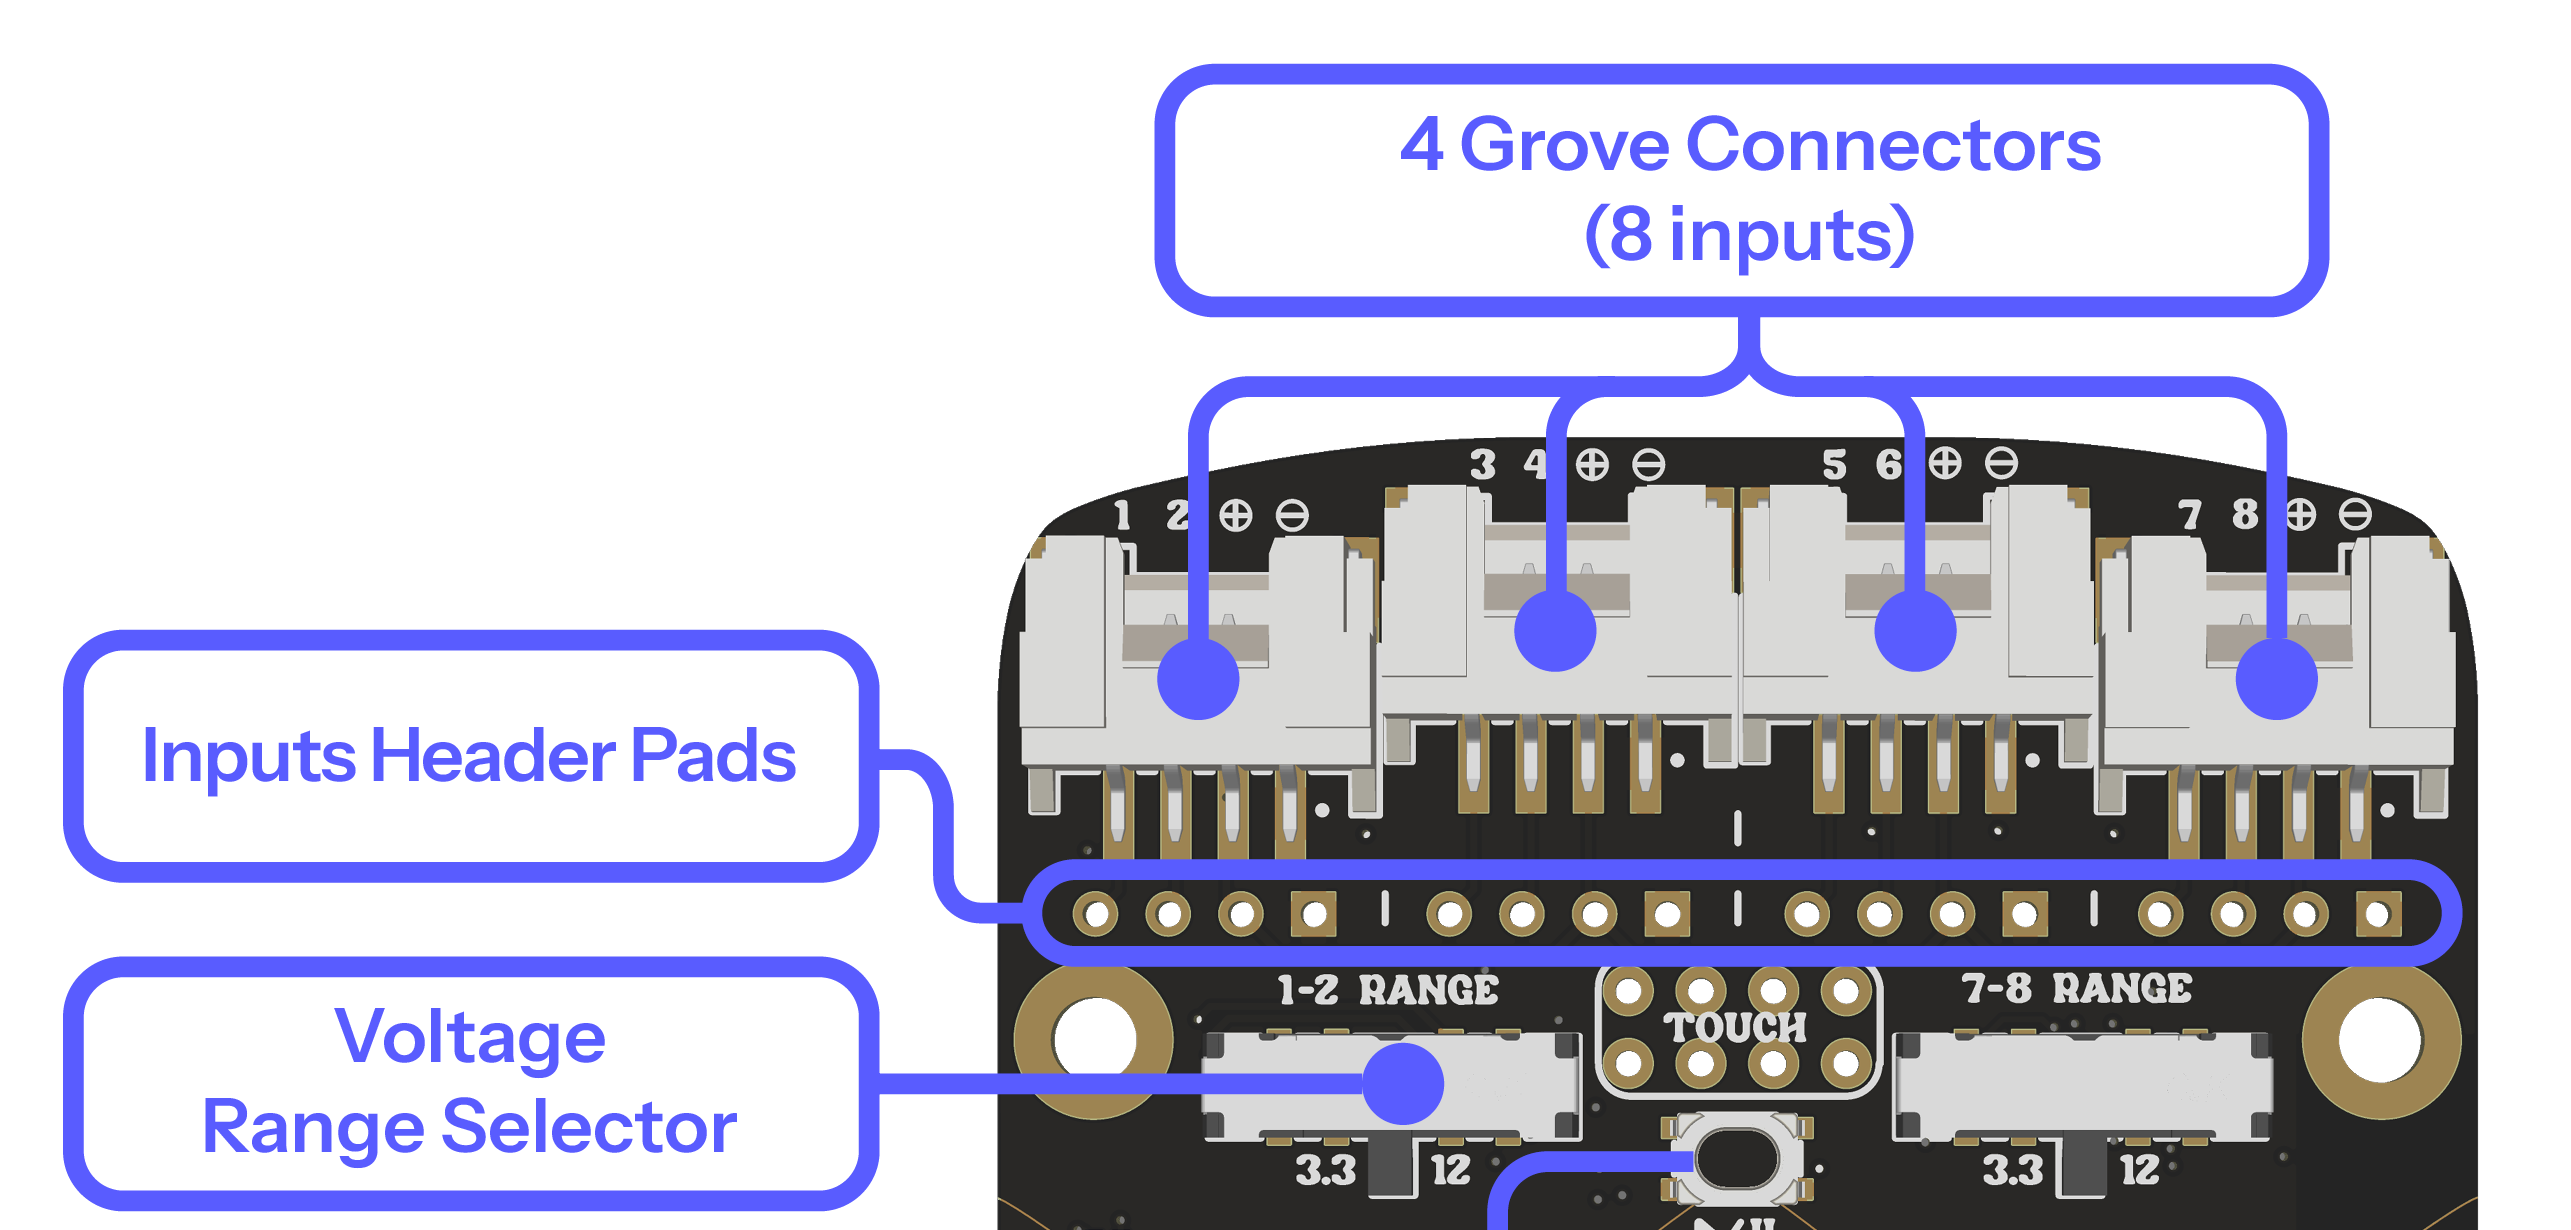
- Each Grove connector, carries 2 signal inputs, a positive supply (3.3v) and a ground.
- Each input has a number from 1 to 8, and correspond to the inputs labelled A1 to A8 in the configuration page
- For custom projects which require to bypass the grove connectors for practical reasons, the "header pads" provide a location to directly solder to the board
Voltage range
Inputs 1/2 and 7/8: These inputs have a voltage range selector. Each slide switch affect respectively input 1/2 and 7/8. You can choose between a range of 3.3v, 5v, and 12v. These inputs are full range. These inputs are pulled down (if nothing is connected, they rest at 0v)
Other inputs (3/4/5/6): They have a maximum voltage input to 3.3v. However, their actual usable measuring range will be up to 3.1v. These inputs are floating (if nothing is connected, they will "float" in the middle of their range).
Modules, terminals, and pin
Grove to grove: If you are connecting a grove module to Pipo using a grove connector, the only thing you have to do is plug a gorve cable on both sides, and configure the input in the configuration page.
Breakout board: Grove to terminal:
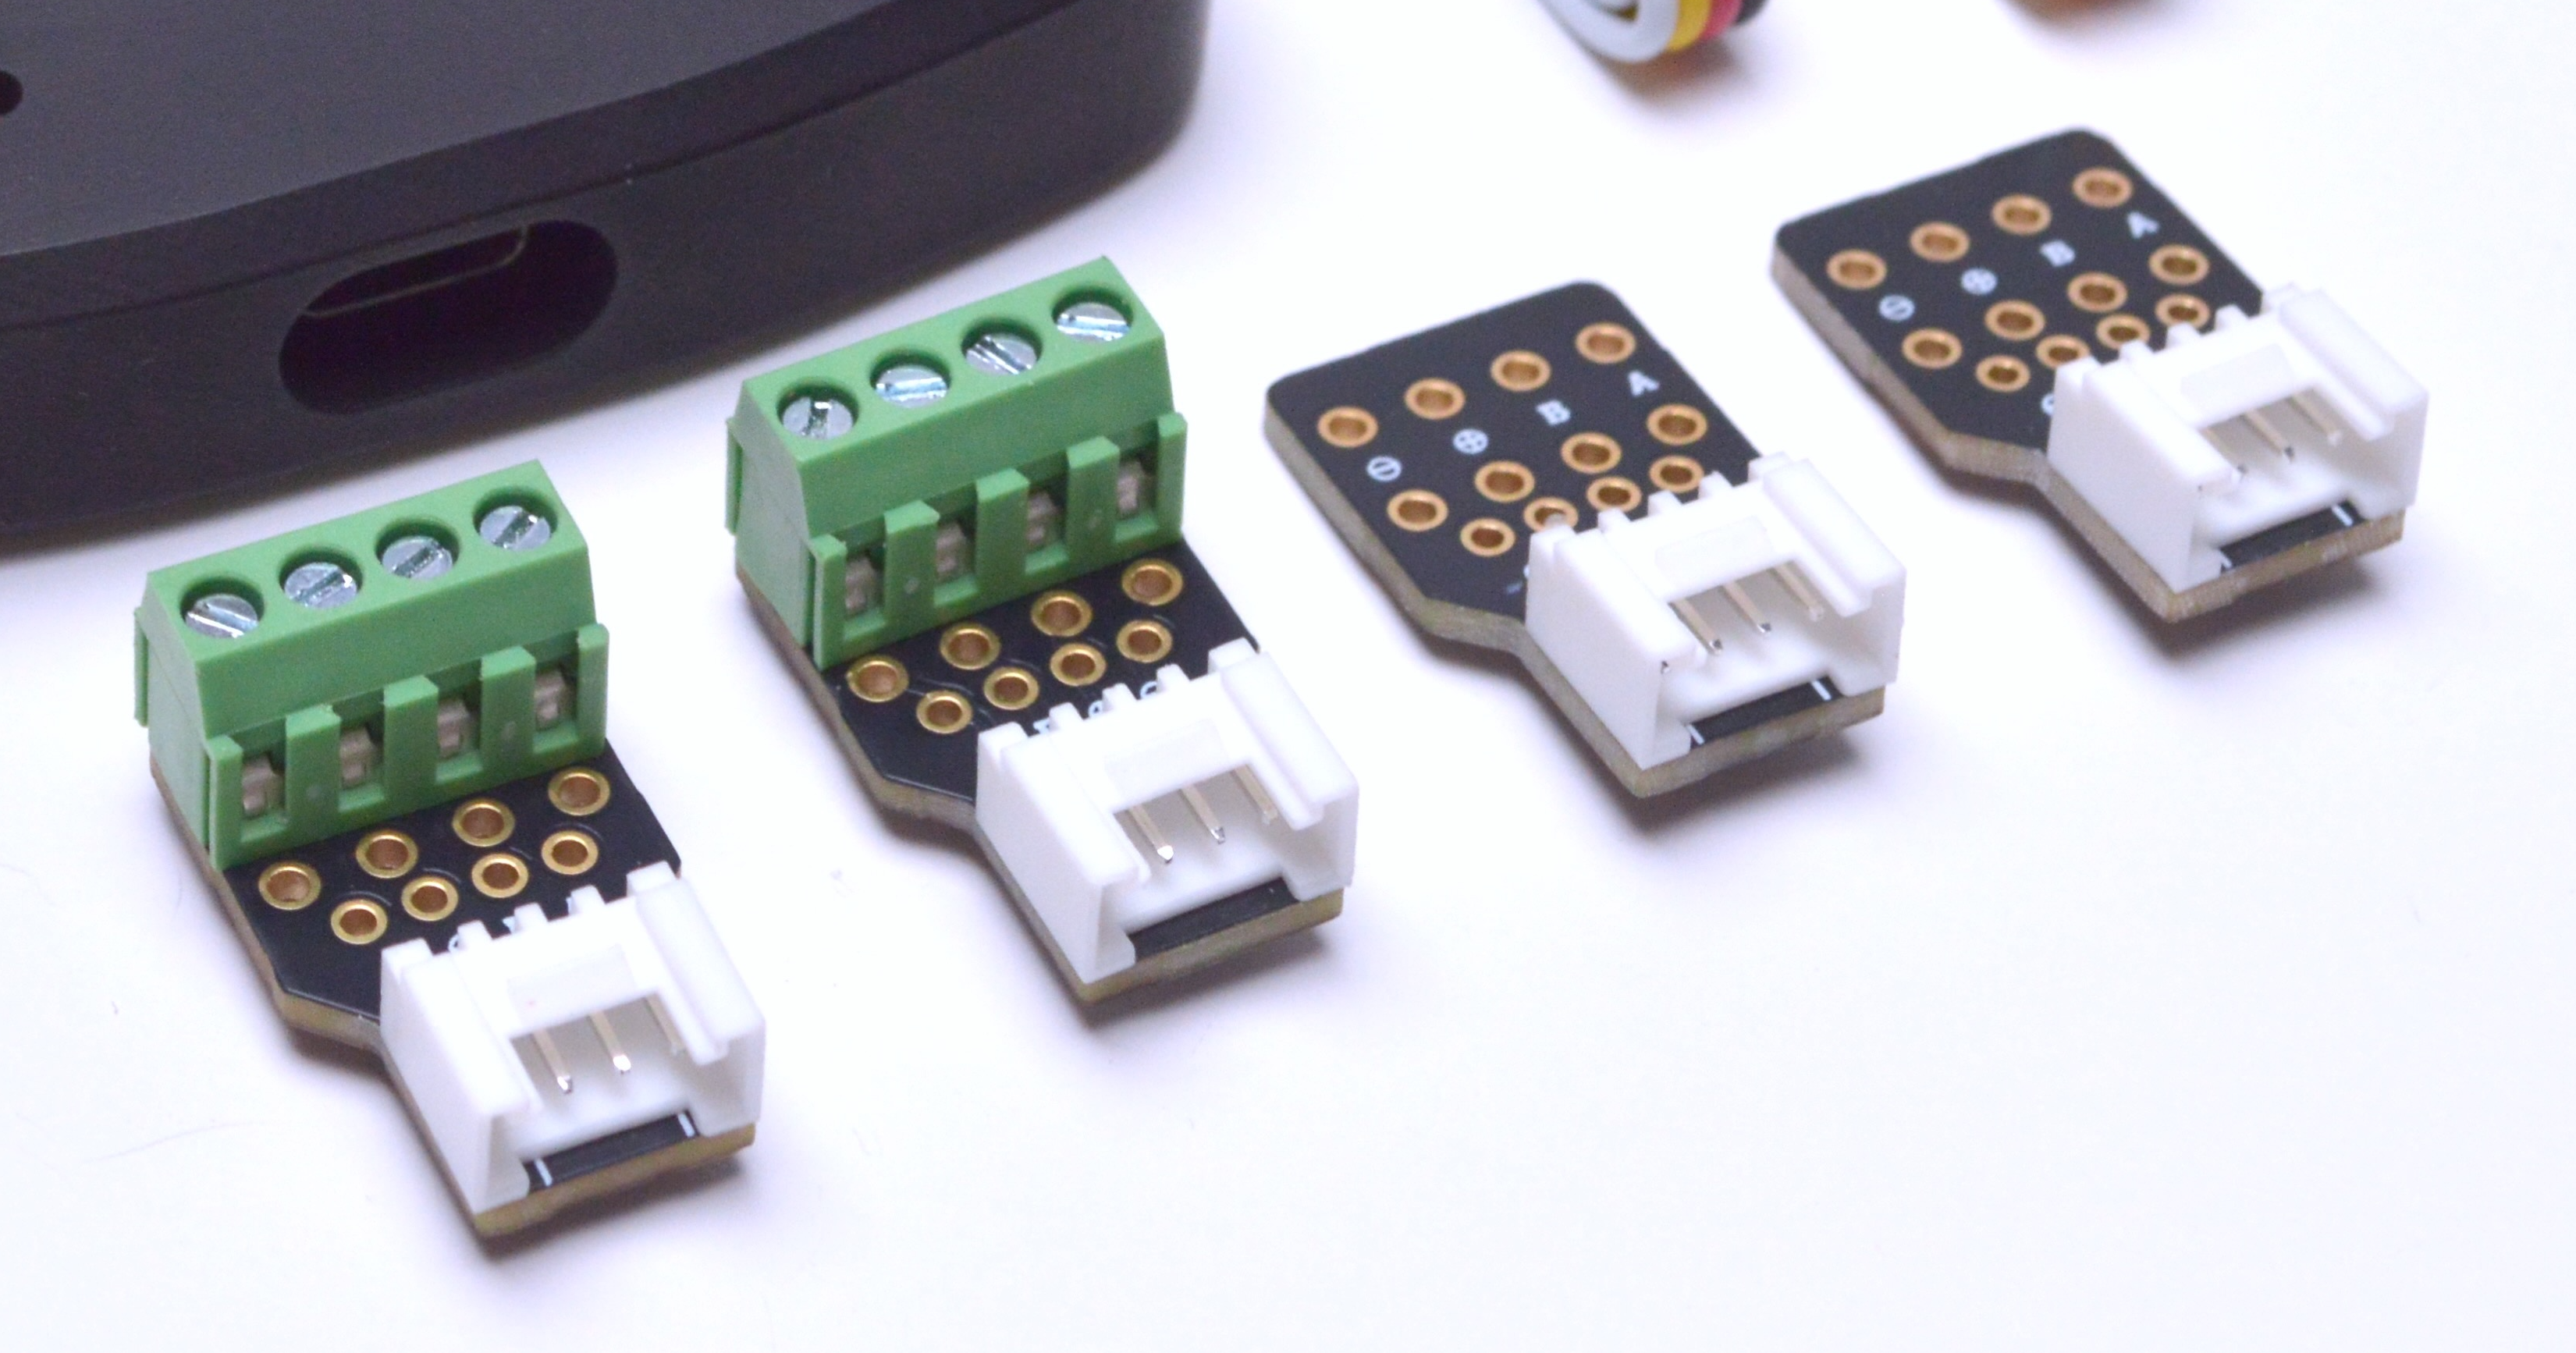
In order to connect all kinds of inputs with other types of connectors you can use the breakout board provided with your Pipo. Connect the breakout board with a grove cable to Pipo, and screw in the terminal any other type of wiring.
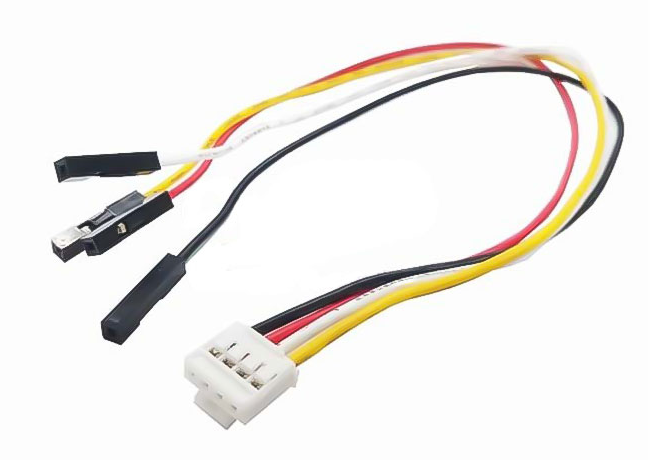
Adapters: To connect to modules with classic headers, you can use adapters grove to header adapters like:
Wiring and input types
If you use a module with a grove connector, the wiring and output pull up/down are already managed for you. But if you want to wire your own modules, you help you from the following guidance.
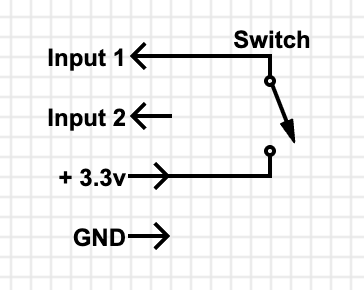
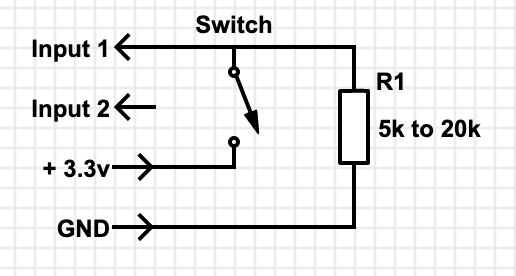
Switch:
- On an input that is already pulled down (1/2/7/8), you can wire any switch directly between the 3.3v and an input.When the switch is closed, the 3.3v will be sent to the input, and when open the internal pulldown of the Pipo will bring the value to 0.
- If you are using input (3/4/5/6), you might want to add a pulldown resistor such as: When the switch is closed, the input will receive 3.3v, and when open, the input will be maintained at 0v through the pulldown resitor.
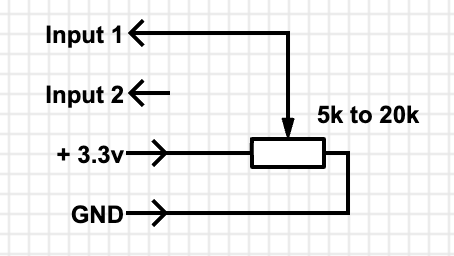
Potentiometer:
Sensor: Most analog sensor only require to suplly them power and conenct their output to a Pipo input
More exemples to come See examples of what you could connect in the meanwhile:
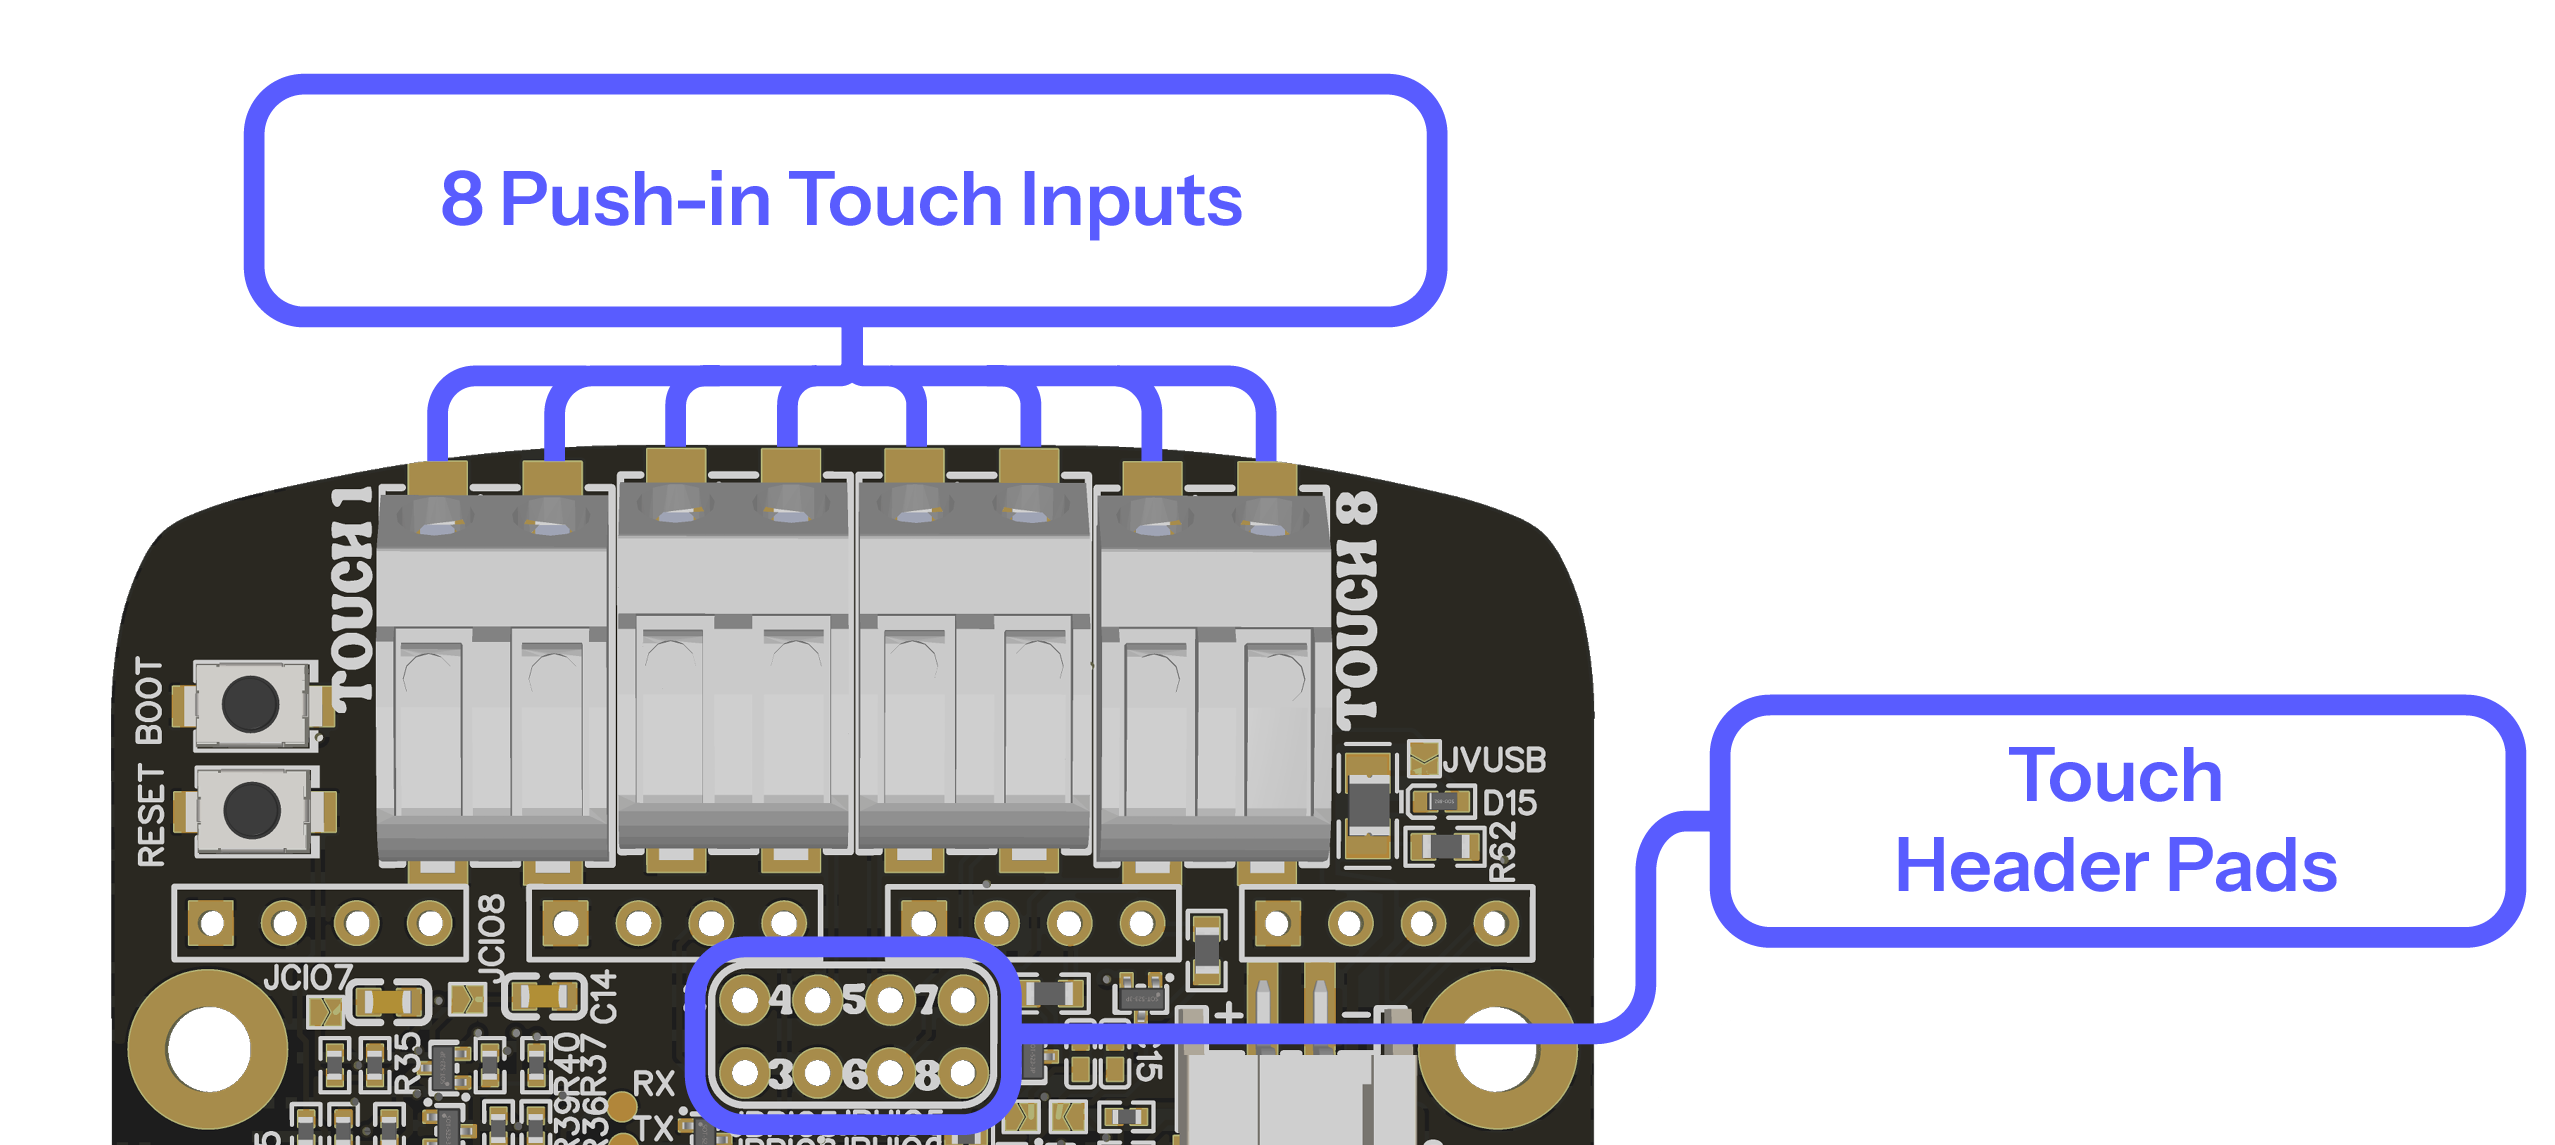
Touch inputs
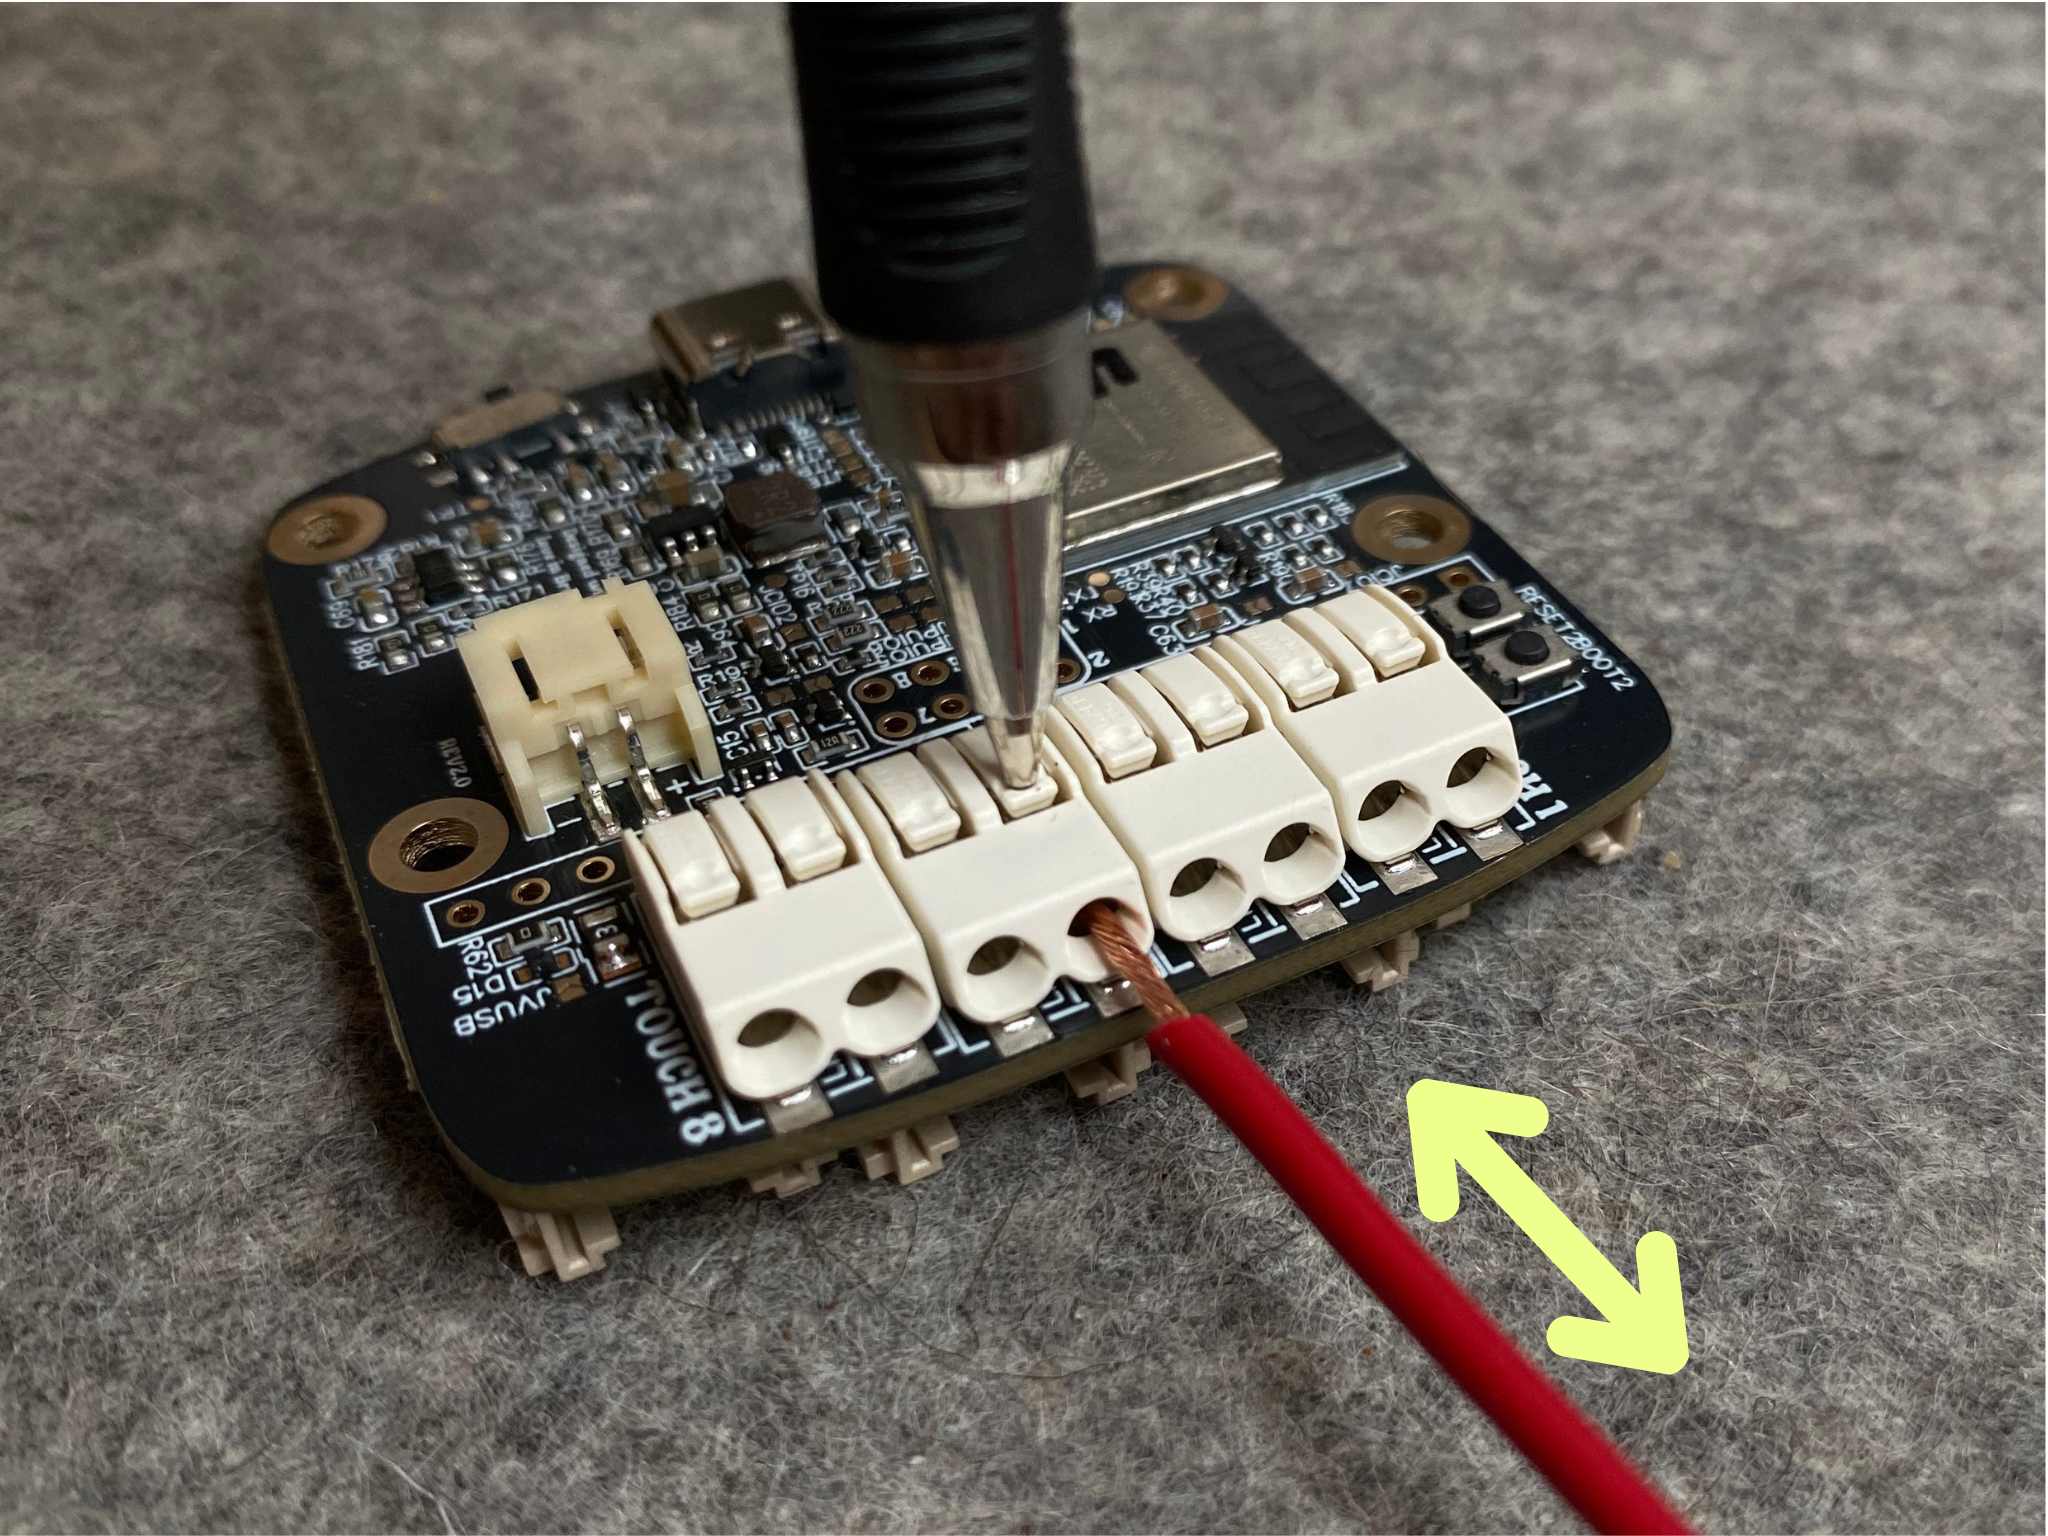
The 8 touch inputs are located on the bottom side of the board. They are distributed as individual "push-in" connectors. These are meant to receive a bare cable (insulation removed) to be inserted and will auto clamp it. To remove a cable, press on the push/release location with a pen.
Unlike the voltage inputs (which expect an actual electrical signal to be fed in), the touch inputs are sensing electrodes by themselves. A touch input measures the capacitance between itself and your body. When you get close to it or touch it, your body adds extra capacitance, and the input detects that change. Connecting an conductive object to the input (just a wire, or a wire to a spoon for eg) is equivalent to increasing the size of the sensing electrode, making it more sensible to body proximity.
Tips
Capacitive touch input are very sensitive to their environement. If you change the setup (moving wires, changing positions, etc...) after Pipo has started, this will influence the detection levels. So you should calibrate wthem through the interface whenever you change something. The calibration should be executed when you are in a "no touch" state (Pipo will also auto calibrates at boot)
- You can connect a touch input to any material that is barely conductive: aluminium tape, fruits, metallic objects, conductive fabric, conductive paint, etc... to create sensing electrodes
- The capacitive touch inputs do not need a direct contact to be triggered, it can sense body capacity through an insulation layer ( up to a few centimeters, depends highly on the setup an materials used)
- The aluminium tape provided with the module is given as an example of how to make a flat electrode of various size. You can put a piece of aluminium tape on a non-conductive sheet material and trun it into a touch surface on the other side for eg.
See this exemple
More infos to come